In part 1 we were dealing with DaoGenerator, only, and did not do anything that was really related to Android itself – no Activities or Fragments are there yet. This time it is different: we are going to implement our apps main RecyclerView (with all classes needed to make it work) and load our list of leases. For the impatient: we are adding a method to mock some data in the end, so we can see, if everything works as expected.
Please allow me to start with some warnings:
Our package holding the generated classes is in the sources folder of our app. As everything, this has both advantages and disadvantages. On one hand we don’t have to import any additional folders to add / import / whatever, on the other hand we have to be careful with changes. To sum in up in a nutshell:
- Yes. you can do manual changes at these generated classes.
- Yes, you can create own files / classes in that folder.
- No, your changes in generated classes won’t survive the next generator-run.
Contents part 2:
- Adding Libraries
- Adjusting the apps Build-file
- Create the main Activity
- Add RecyclerView
- Make RecyclerView work
Adding Libraries
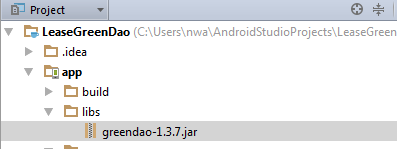
In the first part, we added the generator- and freemarker-lib to the “lib” folder of the generator application. This time, please copy-and-paste the GreenDAO lib to the following folder:
Adjusting the apps Build-file
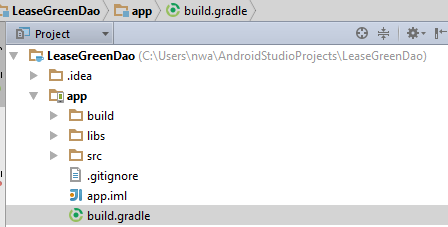
As you will most likely remember, in the last part we already did some adjustments at a Gradle build-file, but we always have to carefully check what we are doing, because WE HAVE 2 BUILD-FILES! Last time we configured the build of the Generator-Java-application – this time we are working on the app. The right file to open is the following one:
In the “dependencies” section, please add the following line for GreenDAO:
compile files('libs/greendao-1.3.7.jar')
compile 'com.android.support:recyclerview-v7:21.0.0'
This will make all dependencies available, but have you noticed the yellow bar at the top of the editor-pane? Android Studio immediately noticed you did some changes and asks for a “Sync” – do that by clicking “sync now”
Create the main Activity
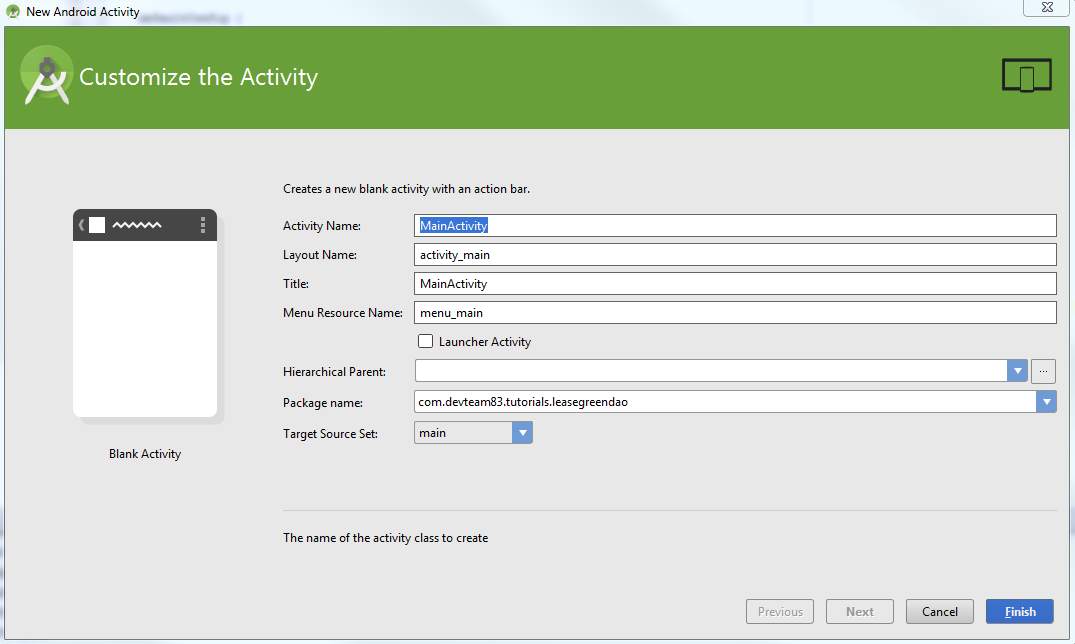
Right click the “app” folder and select “New…” -> “Activity” -> “Blank Activity”. Don’t be afraid Android Studio isn’t providing some prepared views as for ListFragments, we’ll take care of this. In the wizard, please leave everything as it is (except if you changed the package name):
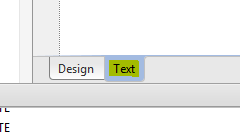
Android Studio is now trying to make life easy for you by starting up the graphical editor for your xml view-definition, but once again we reply “Thanks, but NO, thanks.” and switch to textview:
Add RecyclerView
Adjust the xml as follows:
	<FrameLayout xmlns:android="http://schemas.android.com/apk/res/android"
    xmlns:tools="http://schemas.android.com/tools"
    android:layout_width="match_parent"
    android:layout_height="match_parent"
    tools:context="com.devteam83.tutorials.leasegreendao.MainActivity">

    <android.support.v7.widget.RecyclerView
        xmlns:android="http://schemas.android.com/apk/res/android"
        xmlns:tools="http://schemas.android.com/tools"
        android:id="@+id/main_activity_recyclerView"
        android:layout_width="match_parent"
        android:layout_height="match_parent"
        android:background="#ffffff"
        />
Make RecyclerView work
If you are completely new to RecyclerView please search for a Tutorial covering the basic concepts, because we will not deal with this, as well as the implementation we are doing here will not be “good practice” – it will just be enough to demonstrate usage of GreenDao. If you want to read more about RecyclerView I’ll later add a few links.
Due to the reason we need it in the code we are going to create later, we will start with adding another layout – it will be used for the items in our list later. Right-click the layout folder of the app and select “New” -> “Layout resource file”, call it “activity_main_item” and leave “LinearLayout” in place as root element, it will not be beautiful, but it shouldn’t be too hard to adjust this to your personal sense of a nice UI. Adjust the XML to be as follows:
	<?xml version="1.0" encoding="utf-8"?>
	<LinearLayout xmlns:android="http://schemas.android.com/apk/res/android"
    android:orientation="vertical"
    android:layout_width="match_parent"
    android:layout_height="match_parent">

    <!-- item -->
    <TextView
        android:id="@+id/activity_main_item_item"
        android:layout_width="match_parent"
        android:layout_height="wrap_content"
        android:textSize="16dp" />
    <!-- person name -->
    <TextView
        android:id="@+id/activity_main_item_person_name"
        android:layout_width="match_parent"
        android:layout_height="wrap_content"
        android:textSize="16dp" />

</LinearLayout>
Next step is creating an Adapter that puts together the RecyclerView and and the database, so please right-click the package “com.devteam83.tutorials.leasegreendao” (or however you called it) and select “New” -> “Java class”. A suitable name might be “MainActivityListAdapter”.
We give it a private member “mData” (if Android Studio wants to import things you can always agree) and add a method, that will return the size of this list:
	private List<Lease> mData;

	@Override
    public int getItemCount() {
        return mData.size();
    }
“@Override” will be underlined in red, because that class has no parent (yet!), but that’s no big deal, we will take care of this later. Before that, we create an inner class that will keep references to all items in our RecyclerView (Note: the items in the VIEW, not the items in the database!):
    public static class ViewHolder extends RecyclerView.ViewHolder {

        public TextView textViewItem;
        public TextView textViewPersonName;

        public ViewHolder(View itemLayoutView) {
            super(itemLayoutView);
            textViewItem = (TextView) itemLayoutView.findViewById(R.id.activity_main_item_item);
            textViewPersonName = (TextView) itemLayoutView.findViewById(R.id.activity_main_item_person_name);
        }
    }
We have to override two other methods being invoked by the RecyclerViews layout manager later. These methods will be used anytime a ViewHolder is created (onCreateViewHolder) or gets new data (before it will be displayed – regardless if it has just been created or recycled):
	@Override
    public MainActivityListAdapter.ViewHolder onCreateViewHolder(ViewGroup parent, int viewType) {
        // create a new view
        View itemLayoutView = LayoutInflater.from(parent.getContext())
                .inflate(R.layout.activity_main_item, null);

        // create ViewHolder

        ViewHolder viewHolder = new MainActivityListAdapter.ViewHolder(itemLayoutView);
        return viewHolder;
    }

    @Override
    public void onBindViewHolder(ViewHolder viewHolder, int position) {

        viewHolder.textViewItem.setText(mData
                                .get(position)
                                .getItem());
        viewHolder.textViewPersonName.setText(mData
                                .get(position)
                                .getPerson()
                                .getName());
    }
Not too hard to guess how they work, right? Here we also needed the previously created item layout. The last missing thing in the adapter is the constructor – it is not complicated, but simply getting the itemlist as parameter and putting it to the member.
As promised before, we are also taking care of the underlined “@Override” annotations – we make our class extend
"RecyclerView.Adapter<MainActivityListAdapter.ViewHolder>"
. The full class including imports will look as follows:
package com.devteam83.tutorials.leasegreendao;

import android.support.v7.widget.RecyclerView;
import android.view.LayoutInflater;
import android.view.View;
import android.view.ViewGroup;
import android.widget.TextView;

import com.devteam83.tutorials.leasegreendao.model.Lease;

import java.util.List;

public class MainActivityListAdapter extends RecyclerView.Adapter<MainActivityListAdapter.ViewHolder>{
    private List<Lease> mData;

    public MainActivityListAdapter(List<Lease> data) {
        this.mData = data;
    }

    @Override
    public MainActivityListAdapter.ViewHolder onCreateViewHolder(ViewGroup parent, int viewType) {
        // create a new view
        View itemLayoutView = LayoutInflater.from(parent.getContext())
                .inflate(R.layout.activity_main_item, null);

        // create ViewHolder

        ViewHolder viewHolder = new MainActivityListAdapter.ViewHolder(itemLayoutView);
        return viewHolder;
    }

    @Override
    public void onBindViewHolder(ViewHolder viewHolder, int position) {

        viewHolder.textViewItem.setText(mData
                                .get(position)
                                .getItem());
        viewHolder.textViewPersonName.setText(mData
                                .get(position)
                                .getPerson()
                                .getName());
    }

    @Override
    public int getItemCount() {
        return mData.size();
    }

    public static class ViewHolder extends RecyclerView.ViewHolder {

        public TextView textViewItem;
        public TextView textViewPersonName;

        public ViewHolder(View itemLayoutView) {
            super(itemLayoutView);
            textViewItem = (TextView) itemLayoutView.findViewById(R.id.activity_main_item_item);
            textViewPersonName = (TextView) itemLayoutView.findViewById(R.id.activity_main_item_person_name);
        }
    }
}
Now that our ListAdapter is ready to use, we double click MainActivity.java and insert the following in onCreate:
	DaoMaster.DevOpenHelper helper = new DaoMaster.DevOpenHelper(this, "lease-db", null);
        SQLiteDatabase db = helper.getWritableDatabase();
        DaoMaster daoMaster = new DaoMaster(db);
        DaoSession daoSession = daoMaster.newSession();

	LeaseDao leaseDao = daoSession.getLeaseDao();
        List leaseList = leaseDao.loadAll();

        RecyclerView recyclerView = (RecyclerView) findViewById(R.id.main_activity_recyclerView);
	recyclerView.setLayoutManager(new LinearLayoutManager(this));
        MainActivityListAdapter adapter = new MainActivityListAdapter(leaseList);
        recyclerView.setAdapter(adapter);
We are getting close to be able to run our app, just one step missing! Add an intent-filter to the main activity in AndroidManifest.xml, so it looks as follows:
	<?xml version="1.0" encoding="utf-8"?>
<manifest xmlns:android="http://schemas.android.com/apk/res/android"
    package="com.devteam83.tutorials.leasegreendao" >

    <application
        android:allowBackup="true"
        android:icon="@mipmap/ic_launcher"
        android:label="@string/app_name"
        android:theme="@style/AppTheme" >
        <activity
            android:name=".MainActivity"
            android:label="@string/title_activity_main" >
            <intent-filter>
                <action android:name="android.intent.action.MAIN" />
                <category android:name="android.intent.category.LAUNCHER" />
            </intent-filter>
        </activity>
    </application>

</manifest>
After that, please switch your run config to “app”:
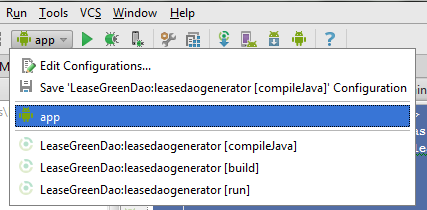
… and try it! Hit the green play-button!
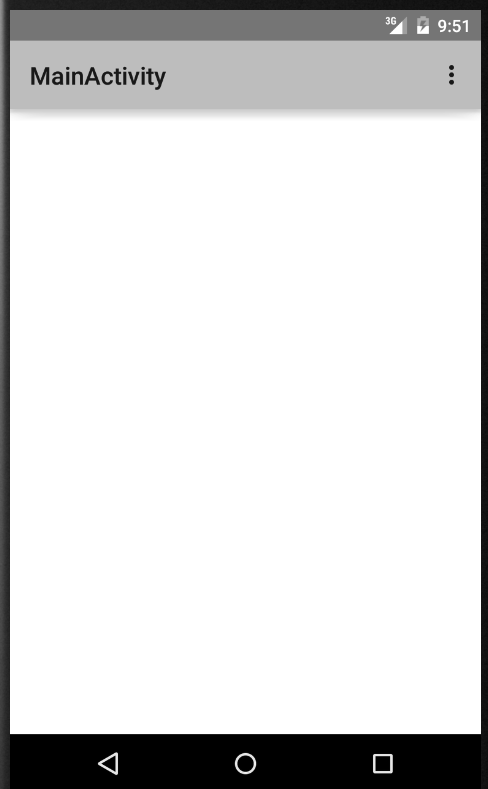
It is empty, huh?
As promised in the beginning, we’ll change this and add some sample-data. Add the following method at the end of MainActivity.java:
	public void insertSampleData(DaoSession daoSession) {
        Person person = new Person();
        person.setName("John Doe");
        PersonDao personDao = daoSession.getPersonDao();
        personDao.insertOrReplace(person);

        Lease lease = new Lease();
        lease.setItem("My Nexus 6");
        lease.setPerson(person);
        LeaseDao leaseDao = daoSession.getLeaseDao();
        leaseDao.insertOrReplace(lease);
    }
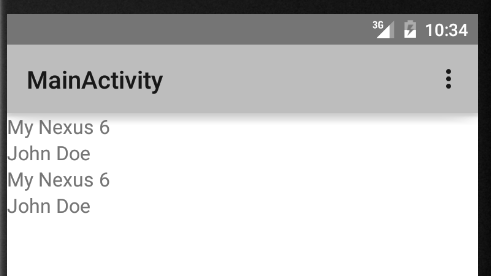
In “onCreate”, after the line “DaoSession daoSession = daoMaster.newSession();” add a call to the new method “insertSampleData(daoSession);” – and that’s it! When you start the app now, it will insert new entities every time.
That was the 2nd part – next time we will handle real CRUD operations. As usual, in case of problems or questions please leave a comment!
This tutorial help me alot, waiting to the next, good job.
Hi Gabriel,
Glad to hear that, thank you!
We are preparing to go live with an app in a few days, so at the moment we are pretty busy. Anyhow, we’ll do our best to deliver the missing 3rd article right after that. Will keep you informed.
Greetings,
Mercatorius
Thank you for this great tutorial! The only tutorial out there that covers every step. I am looking forward to the 3rd article :).
Great Stuff!!
I followed the tutorial , after second part when I compile I get the following error .
Error:(13, 8) error: MainActivityListAdapter is not abstract and does not override abstract method onBindViewHolder(ViewHolder,int) in Adapter
Error:(37, 17) error: cannot find symbol method getItem()
Error:(40, 17) error: cannot find symbol method getPerson()
Error:(32, 5) error: method does not override or implement a method from a supertype
Can you share the source code of full project?
Hi Mithun,
Thanks for posting this question – looks like our CMS (partly) removed classes in <>, like <Lease> etc. at three positions (in the full class listing of MainActivityListAdapter). We fixed that.
Once again, thank you very much for posting this.
Best regards,
Mercatorius
Till facing the same problem…:)
cannot resolve method ‘getItem()’
There was a mistake – the type of a List has to follow the class, not the name, something like:
private List<Lease> mData;
Sorry!
there is a mistake in the code that “The full class including imports”
@Override
public void onBindViewHolder(ViewHolder viewHolder, int position) {
viewHolder.textViewItem.setText(mData
.get(position)
.getItem());
viewHolder.textViewItem.setText(mData
.get(position)
.getPerson()
.getName());
}
the second one should be ‘textViewPersonName’ not ‘textViewItem’
Hi Erkan,
you are absolutely right – I updated the post accordingly.
Very strange: the german version of this post was correct…
Thank you for letting us know.