Some time ago we were searching for an OR-Mapper for Android and we finally found greenDAO. What we did NOT find was a tutorial without the need to checkout a repository (so it wasn’t starting from scratch!). Due to the reason we think a good tutorial is including all steps and doesn’t depend on a prepared project we have to do this ourselves.
So here is our tutorial: greenDAO from scratch – no repositories, no online-dependencies.
Please note, to keep the tutorial short and handy, we will not cover all basics (like installing Android Studio).
In addition we might do certain things you shouldn’t do in a productive real-world-app – like loading data in UI-thread.
In this small tutorial we create an App to manage things you lent to somebody. We will focus on the essential things and will e.g. not access the phones addressbook (maybe that’s a good thing you can implement yourselves? 😉 ). After finishing this series we will have:
the generator for our data model (part 1 – this part)
RecyclerView for showing our data in a list (part 2)
Activities for CRUD (Part 3)
EDIT: missing operations for CRUD (Part 4)
Contents part 1:
- All theory, dear friend, is grey – our Datamodel
- Creating the project
- Download Dependencies
- Adjusting project structure
- Insert the Libraries
- Adjusting the Build-Script of the Generator-Module
- Creating the Datamodel
- Generating Classes
All theory, dear friend, is grey – our Datamodel
The data model is consisting of only to entities: person and lease. We don’t manage items – they’ll be entered as text when lending something. There are the following attributes:
| id |
| name |
| comment |
| id |
| item |
| comment |
| leasedate |
| returndate |
Creating the project
Let us start Android Studio. Just in case there is already a project open, please close it via the menu by selecting “File” -> “Close Project”.
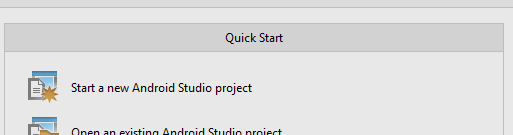
At the right-hand-side in the small window please select “Start a new Android Studio project” directly below “Quick Start”:
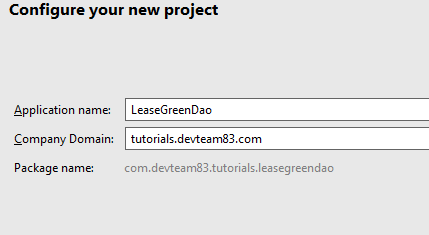
After that, Android Studio asks for a project name and we fill in “LeaseGreenDao”, as well as our company name. Please note the company name is also used as the package name, so I decided to use “tutorials.devteam83.com”.
You should fill in your own Domain (+Sub-package-name), but please have in mind to adjust this in a later stage.
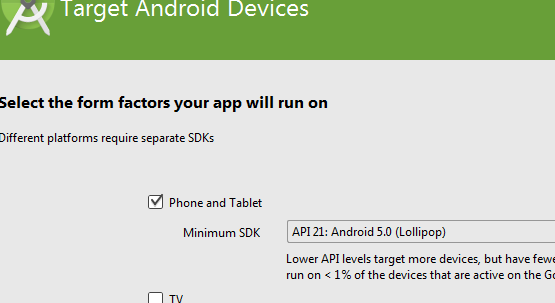
In the following dialog Android Studio asks for “Target Android Devices” of our project – due to the reason this tutorial does not cover differences between versions etc. please select “Phone and Tablet” (API Level 21):
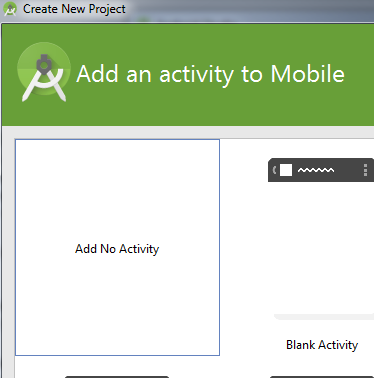
AS wants to do us a favour after this and wants to create an Activity for us – but we gratefully turn down this offer (and select “Add No Activity”):
After we created the project AS Looks very neat and tidy – we don’t even see our project properly, but we change this by clicking “Project”:
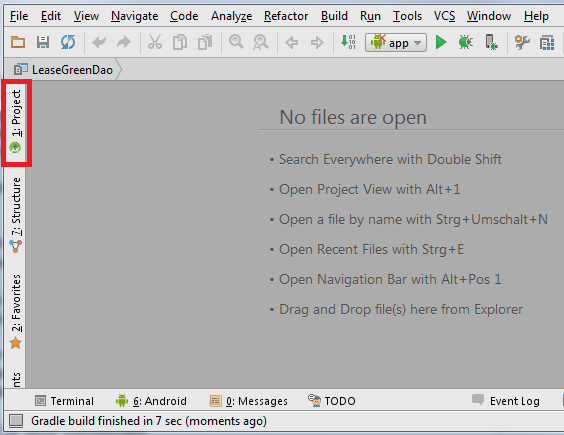
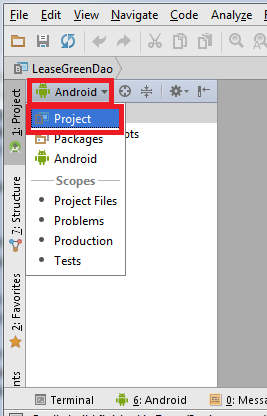
The treeview we see now is not the real structure of folders (and files), so we click “Android” -> “Project”:
Download Dependencies
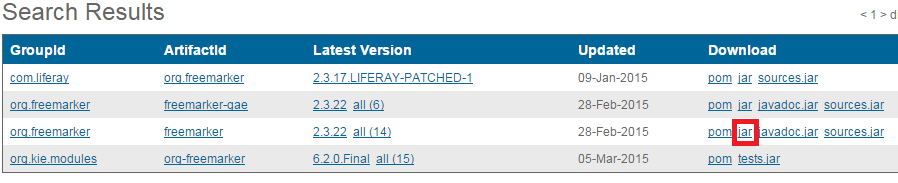
As already said in the beginning, our project should compile without external dependencies from the internet. Due to this we have download a few jar-files now. I don’t want to link to specific versions, so here are search queries on maven.org (Download with a click on “jar” on the right-hand-side):
http://search.maven.org/#search%7Cga%7C1%7Cg%3A%22de.greenrobot%22%20AND%20a%3A%22greendao%22
http://search.maven.org/#search%7Cga%7C1%7Corg.freemarker
Please download the following of freemarker:
Adjusting project structure
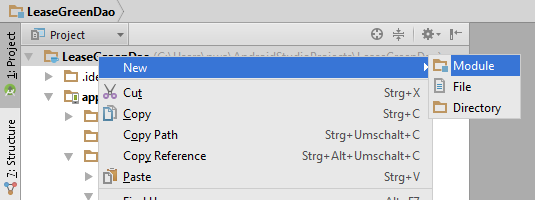
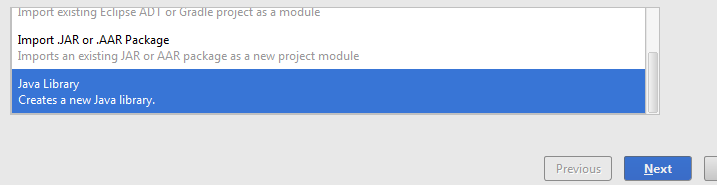
GreenDAO generates the data model for us – directly into our project. This generator is a Java application and we want to separate this from our app, so we have to create a new module. Right-click “LeaseGreenDao” and select “New” -> “Module”
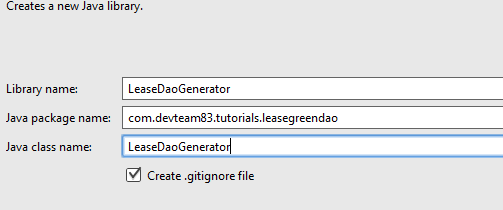
Please select the type “Java Library” aus:
I put in the following data – please adjust these entries the same way as you did in the beginning with the package name:
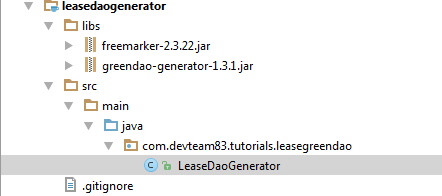
Insert the Libraries
Now we are going to insert “greendao-generator” and “freemarker” in our Generator Modul by using Copy-and-Paste into “libs” folder:

Adjusting the Build-Script of the Generator-Module
First of all, we to let Gradle know about our libs, so we insert into “build.gradle” of Generator Module in the block “dependencies”:
compile files('libs/greendao-generator-1.3.1.jar')
compile files('libs/freemarker-2.3.22.jar')
Please pay attention to insert the correct filename (Version!) exactly as you downloaded them.
As already mentioned before, the Generator part of greenDAO is a separate application, so we have to insert at the very beginning of the build-script:
apply plugin: 'application'
And we will let Gradle know what class to start:
mainClassName = "com.devteam83.tutorials.leasegreendao.LeaseDaoGenerator"
In total, build.gradle of Generator-Module should look as follows:
apply plugin: 'application'
apply plugin: 'java'

mainClassName = "com.devteam83.tutorials.leasegreendao.LeaseDaoGenerator"
dependencies {
    compile fileTree(dir: 'libs', include: ['*.jar'])
    compile files('libs/greendao-generator-1.3.1.jar')
    compile files('libs/freemarker-2.3.22.jar')
}
Please click at “Sync Now” in the yellow bar.
Creating the Datamodel
Now it is getting interesting, we create the model! Open the class “LeaseDaoGenerator” and add the following method:
public static void main(String args[]) throws Exception {
        Schema schema = new Schema(1, "com.devteam83.tutorials.leasegreendao.model");
    }
This means we create a “Schema”, once again we use our package name (+ subpackage model) and tell greenDAO this is version 1. Right after typing in these lines Android Studio wants to do the imports for you – make shure you pick the right ones:
Then, we give greenDAO order to create our entities:
Entity person = schema.addEntity("Person");
person.addIdProperty();
person.addStringProperty("name");
person.addStringProperty("comment");

Entity lease = schema.addEntity("Lease");
lease.addIdProperty();
lease.addStringProperty("item");
lease.addStringProperty("comment");
lease.addLongProperty("leasedate");
lease.addLongProperty("returndate");
As far as I think that’s pretty intuitive, but this would create two separate entities, only, but no relation between them at all. That wouldn’t be enough, a lease shall belong to a person, so we have to add the following:
Property personId = lease.addLongProperty("personId").getProperty();
lease.addToOne(person, personId);
We temporarily save the Property personId, and use the method addToOne() to implement the relationship.
To make the same relation usable the other way round, what means to have an attribute in the person-objects for all leases, we add the following:
ToMany personToLease = person.addToMany(lease, personId);
personToLease.setName("leases");
Our small datamodel is done so far, but we finally have to output our classes:
new DaoGenerator().generateAll(schema, "../app/src/main/java");
The finished generator class looks as follows:
package com.devteam83.tutorials.leasegreendao;

import de.greenrobot.daogenerator.DaoGenerator;
import de.greenrobot.daogenerator.Entity;
import de.greenrobot.daogenerator.Property;
import de.greenrobot.daogenerator.Schema;
import de.greenrobot.daogenerator.ToMany;

public class LeaseDaoGenerator {
    public static void main(String args[]) throws Exception {
        Schema schema = new Schema(1, "com.devteam83.tutorials.leasegreendao.model");

        Entity person = schema.addEntity("Person");
        person.addIdProperty();
        person.addStringProperty("name");
        person.addStringProperty("comment");

        Entity lease = schema.addEntity("Lease");
        lease.addIdProperty();
        lease.addStringProperty("item");
        lease.addStringProperty("comment");
        lease.addLongProperty("leasedate");
        lease.addLongProperty("returndate");

        Property personId = lease.addLongProperty("personId").getProperty();
        lease.addToOne(person, personId);

        ToMany personToLease = person.addToMany(lease, personId);
        personToLease.setName("leases");

        new DaoGenerator().generateAll(schema, "../app/src/main/java");
    }
}
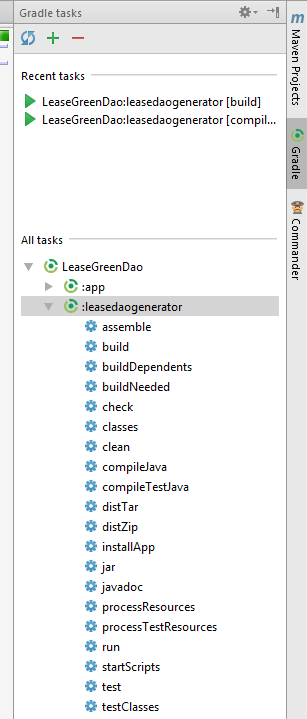
Generating Classes
There isn’t too much to do left, we only have to click “Gradle” at the right-hand-side of the window and launch the “run”-task of “leasedaogenerator”.
As long as there is no typing mistake you should also get the following:
Processed 2 entities in 185ms

BUILD SUCCESSFUL

Total time: 4.1 secs
23:11:50: External task execution finished 'run'.
In our app, the following files should have appeared:

Congratulations!
In case you get errors (or no classes 😮 please repeat / carefully check the a.m. steps or leave a comment
That was part 1 – in the second part we will start to use greenDAO.
new DaoGenerator().generateAll(schema, “../app/src/main/java”); second parameter is wrong, should be “app/src/main/java”.
Dear Chong,
Thank you for your comment.
I just tested both variants (“../app/src/main/java” and “app/src/main/java”):
While the first runs without problems (and generates classes in the app), the second finishes with the following error (and no generated files):
Exception in thread “main” java io IOException: app/src/main/java does not exist. This check is to prevent accidental file generation into a wrong path.
I think the path as shown in the tutorial is correct, if the project is set up as written above. Did you follow all steps in this part or have you made any major changes?
Best regards,
Mercatorius
private static final String PROJECT_DIR = System.getProperty(“user.dir”).replace(“\\”, “/”);
/*
**
*/
new DaoGenerator().generateAll(schema, PROJECT_DIR + “/app/src/main/java”);
Very good tutorial! Thanks!
I have two problems while following the tutorial.
1. The last step of Generating Classes.I ran it and android studio threw a error.It said that “no task to execute is specified”.So I ran it by right-click on class LeaseDaoGenerator and clicked run menu.
2. new DaoGenerator().generateAll(schema, “../app/src/main/java”);
The error was “../app/src/main/java does not exist. This check is to prevent accidental file generation into a wrong path”.So I used the full path instead.My path looks like this ‘/Users/Samuel/AndroidStudioProjects/LeaseGreenDao/app/src/main/java`.
then everything is OK.Hope this helpful.
Hi Samuel, thanks for your comment.
To 1.: I added a screenshot showing where to start the “run”-task – it is at the very right-side of the screen. Would be happy to hear if that helps…
To 2.: Glad to hear you found a working solution. The absolute path has disadvantages when the same sources are used by several developers (I assume with different names 😉 ). Unfortunately it looks like paths are sometimes tricky – you could try if the solution of Lee is working.
Best regards,
Mercatorius